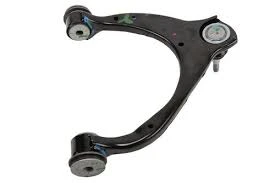
changing upper control arm
Understanding the Process of Changing the Upper Control Arm
The upper control arm is a crucial component of a vehicle’s suspension system, playing a critical role in maintaining proper wheel alignment and handling capabilities. Over time, due to wear and tear, they may need to be replaced to ensure optimal performance. This article will guide you through the essential steps and considerations involved in changing the upper control arm.
Why Change the Upper Control Arm?
The upper control arm connects the vehicle's body to the steering knuckle, allowing for vertical wheel movement while maintaining the alignment of the wheel. Symptoms indicating it may be time for a replacement include
1. Unusual Noises If you hear knocking or clunking noises when driving over bumps, it may be a sign of worn control arm bushings. 2. Poor Handling Difficulty in steering or a loose feeling in the vehicle can signal problems with the control arm. 3. Uneven Tire Wear If your tires exhibit uneven wear patterns, it may be due to misalignment caused by a failing control arm. 4. Visible Damage Inspecting the control arm for visible cracks or bends can also indicate that replacement is necessary.
Tools and Materials Needed
Before beginning the replacement process, ensure you have the following tools and materials
- Socket and wrench set - Jack and jack stands - Ball joint separator - Torque wrench - Replacement upper control arm - Lubricant or grease - Safety goggles and gloves
Steps to Change the Upper Control Arm
1. Prepare the Vehicle Begin by parking your vehicle on a flat surface and engaging the parking brake. Place wheel chocks behind the rear wheels to prevent any movement.
changing upper control arm

2. Lift the Vehicle Use a jack to lift the front of the vehicle. Once elevated, secure it with jack stands to ensure safety while you work underneath.
3. Remove the Wheel Using a socket, remove the lug nuts and take off the front wheel to gain access to the suspension components.
4. Disconnect the Upper Control Arm Locate the bolts securing the upper control arm to the frame and steering knuckle. Using the appropriate size socket, remove these bolts. A ball joint separator may be needed to detach the control arm from the steering knuckle.
5. Inspect Other Components Before installing the new control arm, take this opportunity to inspect the ball joints, bushings, and other suspension components for wear. It’s prudent to replace any other worn parts at this time.
6. Install the New Upper Control Arm Position the new upper control arm into place. Begin by attaching it to the frame and steering knuckle, ensuring that all bolts are aligned properly. Hand-tighten the bolts initially to hold everything in place.
7. Torque Specifications After all connections are in place, use a torque wrench to tighten the bolts according to the manufacturer’s specifications. This step is crucial to ensure proper handling and safety.
8. Reinstall the Wheel Once the upper control arm is securely installed, reattach the wheel and hand-tighten the lug nuts. Lower the vehicle back onto the ground and use the torque wrench to tighten the lug nuts to the proper specifications.
9. Test Drive After replacing the upper control arm, take the vehicle for a test drive. Pay attention to the handling and listen for any unusual noises. If everything feels right, remove the chocks and store your tools.
Conclusion
Changing the upper control arm is a manageable task for those with a basic understanding of automotive repair. However, if you feel uncertain at any point, it’s wise to consult a professional mechanic. Regular maintenance of suspension components not only enhances the performance of your vehicle but also ensures your safety on the road. Always prioritize safety, use the correct tools, and follow procedures carefully to achieve the best results when performing car repairs.


